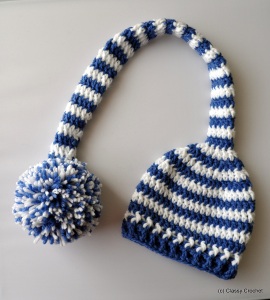
Hello all! Here’s a free pattern for a crocheted striped elf hat. You’ve probably seen these all over: long tails, Dr. Seuss-ian mojo, pompoms, babies in buckets, very Christmassy during the holidays, etc. They’re really easy to make. You just have to have patience during the tail part. 🙂
I make this hat from the bottom up. Some people start at the skinny tail end and work their way down, but I found that it was easier to make the main hat part first and then decide how long I wanted the tail part to be. I do use fpdc and bpdc here, so if you don’t know how to do them I’ve got tutorials or there’s always Google/YouTube.
(On a side note – WHAT did we crocheters do before YouTube? Well, my 12 year old self will tell you. I got really frustrated trying to learn how to crochet out of a book. It took ten plus years and the advent of Internet technology for me to finally pick up my hooks again and have any motivation to make anything cooler than the 20+ pot holders lying around my house.
Second side note – admitting that I learned how to crochet before the Internet even EXISTED makes me feel really, really old.)
Anyway. This particular hat uses the following stitches:
- chainless foundation
- front post double crochet (fpdc)
- back post double crochet (bpdc)
- double crochet
- sl st
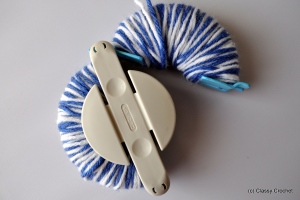
That’s it. You can make a tassel for the tail, but if you want a pompom, I highly recommend a pompom maker for the tail. You can always just make your own pompom from scratch, but I’ve found that using a ‘maker’ greatly reduces the chance of little yarn bits flying out everywhere. I commented in a previous post my joy and anticipation for my extra large one. It rocks.
I use a size H hook and Lion Brand Pound of Love yarn for this hat. H hooks are my go-to for regular worsted weight – if yours is G or I or K or whatever, go with that. I heart Pound of Love because it makes about a thousand hats in each giant skein.
This pattern is for a 0-3 month old. You can make it bigger for an older child by making the first row longer (and adding an extra decrease row), but thus far my main audience for this pattern has been the adowable newborns and subsequent photo ops. Feel free to edit this pattern or contact me with any questions (classycrochet@gmail.com).
Colors: Main Color and Second Color. For the ease of writing this pattern with pictures, I’m just going to refer to Main Color as ‘blue’ and Second Color as ‘white’. Obviously there is a lot of creative freedom here on color choice.
(Scroll down to the bottom of the post if you prefer the written pattern without pesky pictures and notes.)
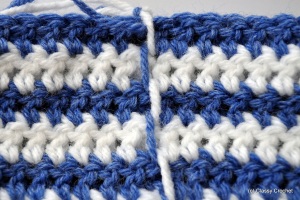
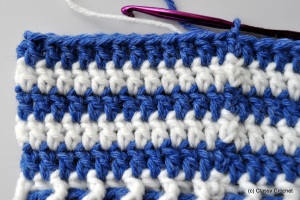
Before we begin, a few notes about changing colors every row. PLEASE do not fasten off each row and start a new color for this hat (the thought makes me gag). To switch colors, first sl st to finish your current row. Then, draw up the next color and pull the previous color yarn down flush with the row. Don’t pull too tightly or your hat will buckle at the seam.
Also, (and this is very important for non-yarn-tangling sanity) make sure to be consistent on which side you draw up the yarn. For example, when I make my hat, I always draw up the main color on the right, and draw up the white yarn on the left. You can see in the photo below how the yarn is alternated when it’s drawn up (this shot is of the hat inside out). It seems like a superfluous step, but believe me, when you switch colors 30-40 times in a hat, you do NOT want the two colors twisted around each other at the end. I speak from personal experience.
Okay, whew. Let’s start.
PATTERN
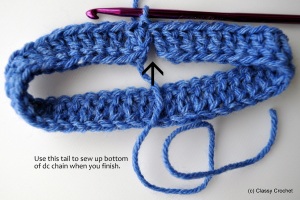
Row 1: Using chainless foundation and blue, dc until your foundation row measures about 12″. For me, this was about 43 st. Make sure it’s an odd number of stitches. Sl st into first dc to create a ring. This will be your first row. (You will use your tail to secure the bottom of the row when you finish.) Your gauge isn’t *terribly* important as long as the first row is about 12″ for a newborn.
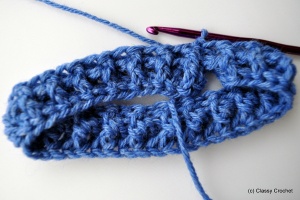
Row 2: Ch2, alternate fpdc and bpdc around. Using the foundation row ch2 as the last bpdc, sl st to first dc. This will create your ribbed brim.
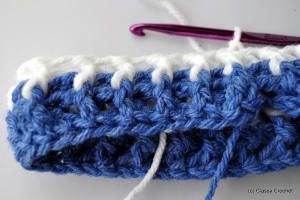
Row 3: Switch to white. Ch2 and fpdc/bpdc as per previous row. Sl st to first dc.
Row 4: Switching back to blue, dc in first st, and continue dc in each st around. At the end of the round, sl st to last st at the end of the row. From here on out, for every row you will: switch colors, ch2, dc in first st, and sl st to last st at the end of the row.
Row 5-9: Ch2, dc in each st around. Row 9 should be blue.
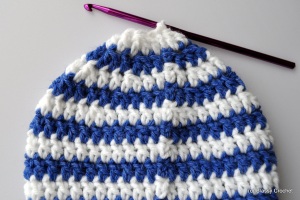
Row 10: Ch2, *1 dc in next 5 st, dec over next 2 dc. * Repeat * around as many times as your stitches will allow. 1 dc in each remaining st to end. Here is a tutorial for dec over dc.
Row 11: Ch2, *1 dc in next 3 st, dec over next 2 dc.* Repeat * around as many times as your stitches will allow. 1 dc in each remaining st to end.
Row 12: Ch2, *1 dc in next 2 st, dec over next 2 dc.* Repeat * around as many times as your stitches will allow. 1 dc in each remaining st to end.
Row 13: Ch2, *1 dc in next 2 st, dec over next 2 dc.* Repeat * around as many times as your stitches will allow. 1 dc in each remaining st to end.
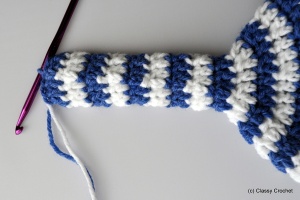
At this point, you should have somewhere in the vicinity of 10 dc left. The remainder of the hat is the tail, and you can make it as long or as short as you want. I like to have a slight taper in my tail, so I go for about 10 rows before doing one more dc dec:
Row 14-24: Ch2, 1 dc in each st around.
Row 25: Ch2, dec over next 2 dc, 1 dc in each remaining st around.
The rest of the tail can be as long as your patience lasts. I aim for about 25 more rows (!) before finishing off. It seems like for-e-ver, but it goes pretty fast. Once you’re done, leave about 6″ tails to attach the pompom/tassel.
Make your fringe of choice. The trick I’ve learned with a pompom maker is to wrap the yarn around a. lot. and make it pretty thick before cutting and tying off. This way, you get a nice thick pompom and the tie is squished in there and therefore you don’t have random strands of pompom coming out every time you touch your hat. I actually originally started with the tassel because my handmade pompoms were extremely sad and frustrating and I lost a lot of sleep over them. Then I finally caved and paid $9.32 for a Clover maker, and have had sweet sweet pompom dreams ever since.
Use the ties and your tails on your hat to secure the pompom. I like to use a needle and ‘sew’ the pompom on, sticking the tails through the pompom several times to make sure it’s really secure.
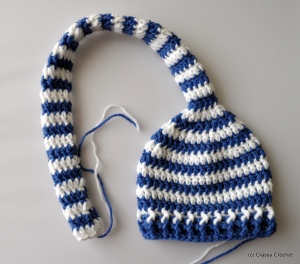
Voila! Awesome stripey hat completed!
PATTERN
Row 1: Using chainless foundation and blue, dc until your foundation row measures about 12″. Make sure it’s an odd number of stitches. Sl st into first dc to create a ring. This will be your first row.
Row 2: Ch2, alternate fpdc and bpdc around. Using the foundation row ch2 as the last bpdc, sl st to first dc. This will create your ribbed brim.
Row 3: Switch to white. Ch2 and fpdc/bpdc as per previous row. Sl st to first dc.
Row 4: Switching back to blue, dc in first st, and continue dc in each st around. At the end of the round, sl st to last st at the end of the row. From here on out, for every row you will: switch colors, ch2, dc in first st, and sl st to last st at the end of the row.
Row 5-9: Ch2, dc in each st around. Row 9 should be blue.
Row 10: Ch2, *1 dc in next 5 st, dec over next 2 dc. * Repeat * around as many times as your stitches will allow. 1 dc in each remaining st to end. Here is a tutorial for dec over dc.
Row 11: Ch2, *1 dc in next 3 st, dec over next 2 dc.* Repeat * around as many times as your stitches will allow. 1 dc in each remaining st to end.
Row 12: Ch2, *1 dc in next 2 st, dec over next 2 dc.* Repeat * around as many times as your stitches will allow. 1 dc in each remaining st to end.
Row 13: Ch2, *1 dc in next 2 st, dec over next 2 dc.* Repeat * around as many times as your stitches will allow. 1 dc in each remaining st to end.
At this point, you should have somewhere in the vicinity of 10 dc left. The remainder of the hat is the tail, and you can make it as long or as short as you want. I like to have a slight taper in my tail, so I go for about 10 rows before doing one more dc dec:
Row 14-24: Ch2, 1 dc in each st around.
Row 25: Ch2, dec over next 2 dc, 1 dc in each remaining st around.
The rest of the tail can be as long as your patience lasts. I aim for about 25 more rows (!) before finishing off. It seems like for-e-ver, but it goes pretty fast. Once you’re done, fasten off both colors and leave about 6″ tails to attach the pompom/tassel.
Make pompom/tassel. Attach to hat. Revel in stripey cuteness.
Follow along with the project gallery on Ravelry! 
Small disclaimer: some people have expressed concern for the potential for choking when putting hats with really long tails on small babies. My answer: please be a responsible adult and be responsible for the hat and the baby. Since I’ve only made this for newborns who don’t really have a whole lot of self-induced physical motion, I haven’t been in many situations where the hat would be potentially dangerous. Use your wise judgment and hat your baby accordingly.





Reblogged this on Knot Just Yarn: The Crochet Crowd Blog and commented:
Crochet Elf Hat! Pretty awesome photo prop too!
LikeLike
What did I do before the internet? I ordered a video from the library, had to wait about 10 days for it to come in and then I watching the video …. imagine waiting a week to get access to a youtube video?
PS – thanks for the awesome pattern!
LikeLike
I just went to the library the other day to browse knitting books… I can’t even imagine trying to learn how to knit just from pictures. Thank HEAVENS for technology. =D
LikeLike
I found this awesome video showing how to do chainless foundation double crochet http://m.allfreecrochet.com/Crochet-Videos/How-to-Crochet-a-Chainless-Foundation-with-Double-Crochet
LikeLike
What is chainless foundation ?
LikeLike
I am doing this hat and for some reason when I get to where it is suppose to start the tail of the hat mine isn’t getting smaller. I don’t know what I am doing wrong. If someone could possibly tell me I would greatly appreciate it. Thank you.
LikeLike
Hi there – depending on how big you made the hat, your tail part might be a bit wider around and will probably require a few more dc dec to get to the desired ‘skinnyness’. The pattern is very flexible, adjust it however you need. =D Good luck!
LikeLike
I believe in row 8 it should be white. Does it matter?
LikeLike
I meant row 9 not 8.
LikeLike
All odd and even rows should be the same color – if you start row 1 with blue, row 9 (odd) should also be blue, and vice versa if you start with white. But I don’t think it really matters – you can stripe this hat however you want. =D
LikeLike
WOW!!! You are an excellent crocheter!!! Your items are so professional! Thank you for the free pattern! Love it!
Cheryl
LikeLike
Reblogged this on Purple Headspace and commented:
Using this as a guide to make a pixie hat.. with a view to making one big enough for my 4 year old for this winter – watch this space! hat is made just have to make an alternative to the pompom. 🙂
LikeLike
Thank you for the tip on not fastening each row off… It was so much simpler this way! I made one for my sister. Although I had to change a couple things, like size because she’s 16, this pattern was very helpful!
LikeLike
how do I print a free pattern off pinterest?
LikeLike
Thanks for the pattern and the pompom maker also
LikeLike
If the foundation chainless row is row 1 and blue, and the color is not changed until row 3, there is simply no way mathematically that row 9 can be blue as well. It has to be the white color. Or else I am messing up somewhere.
LikeLike
sorry about that, when I was counting the rows I was looking at the photo and forgetting the first blue row was actually 2dc. Thanks for pointing it out!
LikeLike
I know iit’s been a few years, hopefully this still helps someone, but i got the same math on this pattern when i looked it over. So i just gifted if just keep alternating colors starting at row 3 and it’ll be ok. It’ll be the 2 colors same in three brim, then alternate starting from row 3. So, even numbers would be the main color (1st color) it’s how i wrote mine.
Hope this helped.
Oh thank you for talking about the chainless foundation, i always forget to. I assume most intermediate crocheters know it.
LikeLike
Jen,
I am trying so hard to understand this pattern but I’m thrown off as you end row 4 with, ” sl stitch into last stitch at end of row. Then chain 2 then dc into first stitch of next row”. My rows look crooked at that end/begin part. Yet your photos of each step look perfectly across. Why don’t I just do the last dc at the end of the row, join to first stitch with a slip stitch, then chain 2 and dc in first stitch and all the way around? I would repeat this as rows 5-9. With each row, there is one increase, at the beginning. Is there a chance you have his pattern as a video so that I could follow it?
LikeLike
Hi Linda– Sorry to hear you’re having trouble. I think what you’re describing what you’re doing is what I mean to say. There shouldn’t be an increase. if you’ve made hats before or done any crocheting in the round, just follow how you would normally join… this pattern isn’t meant to be overly complicated. 🙂 Good luck!
LikeLike
Can you do this without the chainless foundation lol? I’m having a hard time trying to figure it out!
LikeLike
absolutely, you can just ch however many stitches you want for the first row and then dc into each ch the way you would start any normal crochet beginning. good luck!
LikeLike
Would you suggest doing the 43 like you did to get the newborn size? 🙂
LikeLike
Love the pattern
LikeLike
I am slightly confused. It says Row 9 should be blue, but mine keeps coming out to be white. Here’s what I’m doing. Row 1-2 (Blue), Row 3 (white), 4 blue, 5 white, 6 blue, 7 white, 8 blue 9 white. Did I miss a color change somewhere?
LikeLike
Thankyou so much for the pattern,made one last night ,thrilled to bits with it
LikeLike
Thanks! Very easy to follow your directions!
LikeLike
Hi! I would love to make this Elf hat for a baby with a head circumference of 14.5 inches. Do I still follow the pattern? Thanks
LikeLike
Pingback: 137 Free Newborn Hat Patterns - Florence Witt
Pingback: Crochet: 69+ Creative Patterns of Crochet Baby Hats – CrochetingHearts.org